
Understanding what to prepare when you go camping can indeed be a puzzle. Honestly, I empathize with the challenge of trying to prepare meals amidst nature without it becoming an overwhelming task.
Seeing that camping has turned into a preferred holiday choice for countless people annually, I concluded it was time to confront this problem directly. This guide intends to ease your campsite cooking, transforming meal times into delightful moments.
Here we go!
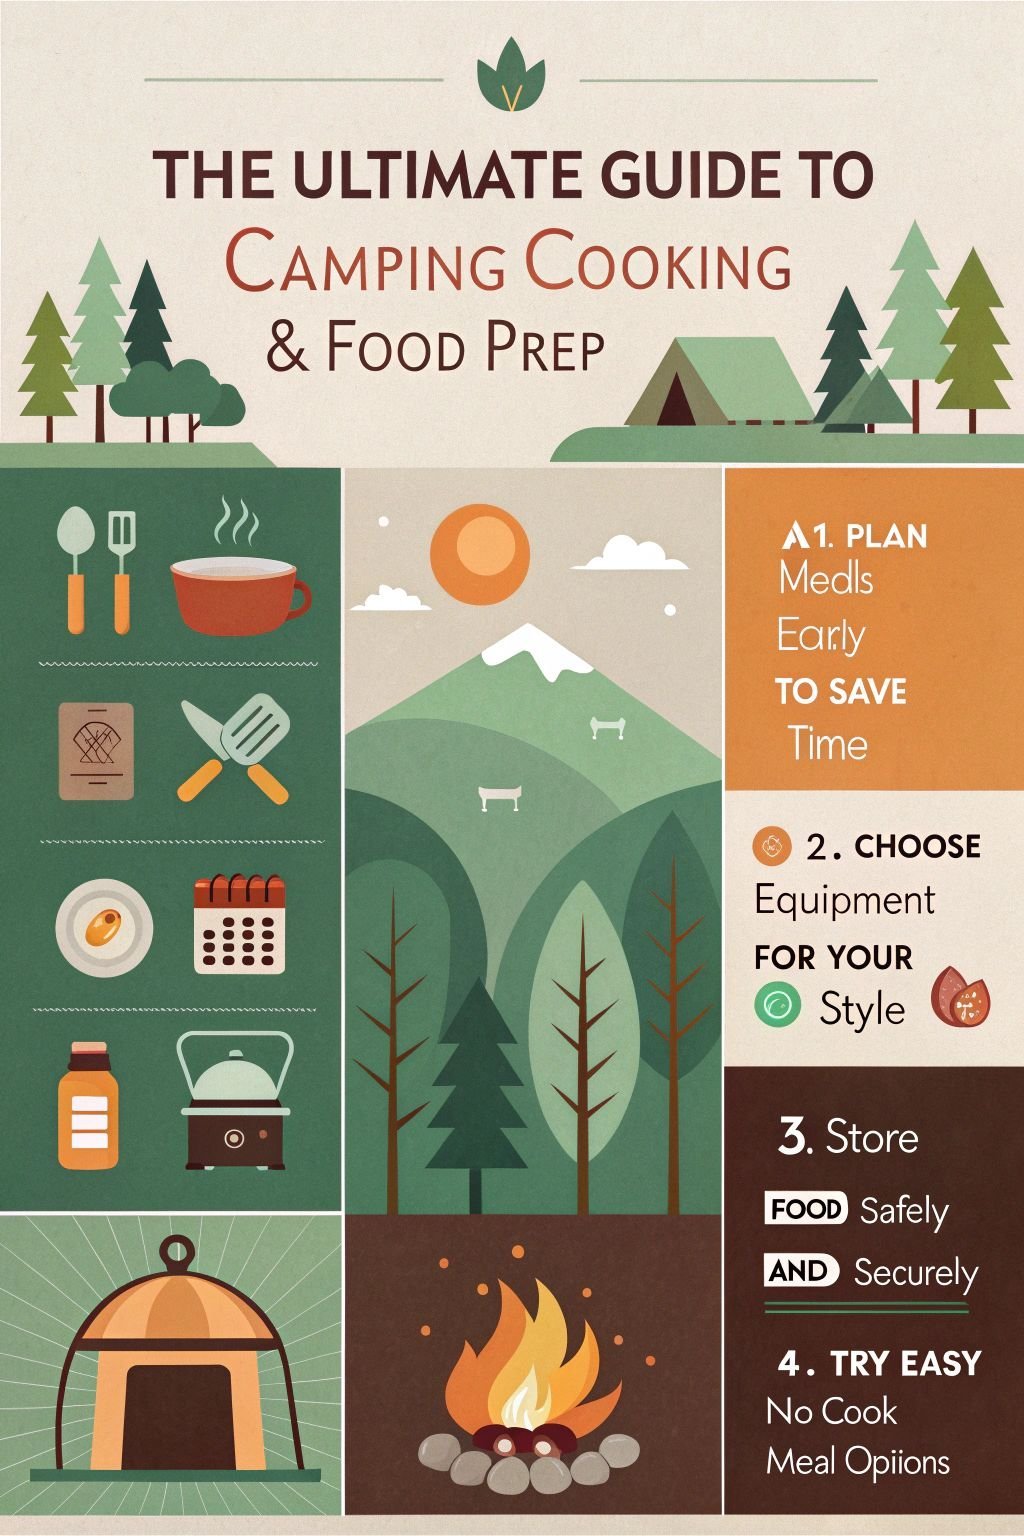
Importance of meal planning for camping
Meal planning for camping is a game-changer. It saves time and reduces waste, allowing me to enjoy the great outdoors without hassle. Before packing my backpack or loading up the car, I always make sure to plan each meal.
This ensures I have enough food while also keeping my pack light. I focus on non-perishable items like pasta and rice for energy during hikes. Incorporating proteins such as beef jerky or canned chicken helps maintain my strength on the trail.
I’ve learned that bringing along pre-marinated meats and chopping vegetables at home makes campfire dinners quick and delightful. Storing ingredients in plastic bags keeps them fresh and minimizes mess.
Plus, it’s crucial for avoiding bears and other wildlife attracted by food smells at campsites. Meal planning isn’t just about what to eat; it’s about staying safe while enjoying nature’s bounty.
Now let’s gear up with essential cooking equipment for our next camping adventure.
Benefits of preparing food ahead of time
Transitioning from the significance of meal preparation, let’s start with how organizing food prior to a camping journey can make it significantly easier. I’ve garnered knowledge from my past experiences that cutting up vegetables, pre-marinating steaks or chicken for the grill, and premixing sauces can do more than just save you time at the campsite.
It also ensures you have wholesome, energy-rich meals at your disposal to energize your escapades.
A meal prepared well in advance is as good as half-cooked.
Getting pancakes prepared by mixing dry ingredients in a ziplock bag or pre-cooking pasta for a quick warm-up serves to shorten cooking time and lessen the cleaning afterward. Visualize coming back from an extended hike; fatigue sets in.
The idea of beginning dinner preparations from zero can seem overwhelming. Here, the availability of my pre-made chili pepper sauce proves beneficial – it transforms simple boiled noodles fetched from my backpack into a culinary delight by merely warming them on my portable stove.
This tactic has improved my wilderness cooking skills and granted me more moments to appreciate sunsets rather than worry about slicing onions under a tarpaulin shelter as night falls.
Overview of cooking methods while camping
Crafting meals before heading out for a camping trip has always reduced my baggage and brought peace to my mind. Let’s explore cooking techniques that can enrich your adventure under the celestial dome.
Concerning campsite cooking, the choice typically sways between traditional fire or the updated ease of portable stoves. Having tried both, I can convey that each infuses its distinct essence metaphorically and gustatorily.
There’s an exclusive charm about assembling around a campfire, where the fragrance of smoke imbibes into every recollection. The distinctive flavor it imparts from crackling sausages and baked potatoes to caramelized marshmallows can’t be replicated.
Nonetheless, mastering flame control is a skill; too low and there’s a prolonged wait; too high, and your feast might become cinders. My recent trip included determining the ideal coal heat for a chicken roast that was nothing less than exceptional.
At different times, particularly those crisp mornings when my hunger howls louder than a rutting bear, I resort to my reliable camping stove for rescue. It’s ideal for brewing a piping hot cup of coffee or cooking some oatmeal promptly and consistently.
Portable stoves champion with their unwavering warmth a boon during fire prohibitions or in spaces where open flames are looked down upon. Additionally, deciding between propane and butane requires consideration as the accessibility fluctuates according to your exploration site.
Each cooking technique reveals new insights in creating meals amidst nature’s hug a priceless competency for any camper trekking into the wilderness.
Essential Camping Cooking Gear
I always pack a portable camping stove for my trips. These stoves are great because you can choose from different fuel options. I’ve found that propane works best for me since it’s easy to find and carry.
Another must-have is the right cookware. I prefer lightweight non-stick pans because they’re easier to handle over a campfire or stove and make cleaning up a breeze.
For utensils, I go for multi-purpose tools. A single tool that can act as a spoon, fork, and knife saves space in my backpack and reduces what I have to bring along. Also crucial is choosing durable food storage solutions.
Dry foods stay safe in tight-sealing containers, while perishables need a good cooler with ice packs to stay fresh until it’s time to cook them up into delicious meals by the campfire or on the grill.
Must-Have Cooking Equipment for Camping
Choosing the right cooking equipment can make or break my camping meals. I always pack a portable stove because it’s reliable and easy to control the temperature, vital for boiling water or grilling chicken.
For fuel, propane tanks are a go-to due to their convenience and wide availability. However, nothing beats the flavor of food cooked over a campfire, so bringing along a grate for open-flame cooking adds that special touch to hamburgers and hot dogs.
My cookware selection typically includes lightweight but durable options like non-stick pans and cast iron skillets which are perfect for everything from frying eggs to baking bread.
For utensils, I prefer multi-purpose tools that don’t take up much space in my backpack think sporks, compact knives, and collapsible bowls.
Aluminum foil has become indispensable too; it’s great for wrapping potatoes or corn for roasting on coals and making cleanup easier after meal prep is done.
Having the right gear turns cooking outdoors from a chore into an enjoyable part of the camping experience.
Campfires: Pros & Cons
I always weigh the options between stoves and campfires before heading out camping. Portable camping stoves, for example, offer convenience and control.
They start up quickly and let me adjust the flame to cook food evenly, which is great for meals that need consistent heat like a morning scramble or simmering tomato sauce for pasta.
However, they rely on fuel canisters that I need to pack in and out of the campsite.
Campfires, on the other hand, give me an authentic outdoor experience. Cooking over an open fire with cast iron brings out flavors in a way that a stove can’t match. There’s something about grilling chicken or toasting marshmallows directly over flames that feels deeply satisfying.
But making a campfire takes skill and patience. It also depends heavily on weather conditions and local regulations since many areas restrict fires during dry seasons to prevent wildfires.
Portable camping stoves and fuel options
Selecting the ideal portable camping stove could drastically alter your camping experience. In my experience, they primarily come in two types: canister stoves and liquid fuel stoves.
Canister stoves operate on pre-pressurized gas cartridges, which are lightweight and straightforward to utilize. They’re the ideal choice for backpacking journeys where weight plays a significant role.
Alternatively, liquid fuel stoves function with refillable fuel bottles. Although these are slightly heavier, they deliver superior performance in chilly weather.
A variety of fuel options are accessible and they encompass propane, butane, and white gas among others. On many journeys, I’ve learned that propane remains dependable for short trips due to its broad accessibility.
Butane behaves similarly, however it doesn’t perform as well in freezing conditions. For extended or colder treks, I tend to lean on white gas due to its consistent performance under various circumstances.
Each option carries advantages and disadvantages which depend on your individual camping style and needs.
Now, allow me to shift the conversation to cookware suitable for these cooking environments.
Cookware: Cast iron, non-stick, and lightweight options
After selecting the optimal stove and fuel for my camping adventures, I rapidly understood the importance of the right cookware. Cast iron skillets have emerged as my favored choice for campground meals due to their heat distribution capabilities and high-temperature endurance.
They prove their mettle in preparing everything from morning eggs to dinner poultry. Despite their weight, which may not be backpacking-friendly, they are ideal for car camping.
For more weight-friendly options that are a better fit for hiking enthusiasts like myself, non-stick and aluminum cookware provide an excellent alternative. They are considerably simpler to transport and clean after a tiresome day of wilderness exploration.
Additionally, the use of non-stick pans enables me to use less butter or oil while preparing meals like pancakes or cooking French fries at the campsite – enhancing meal preparation speed as well as healthiness.
The suitable cast iron skillet transforms any campfire into a gourmet kitchen.
Utensils and multi-purpose tools
Transitioning from the selection of appropriate cookware, let’s discuss utensils and multi-functional equipment. I consistently bring a flexible set of kitchen tools that offer a range of uses.
This implies having a knife that is capable of slicing vegetables for salads but also strong enough to cut through chicken. Spatulas, tongs, and wooden spoons are lightweight though important for stirring campfire chili or flipping pancakes.
My distinct favorite is a tool that merges the functions of scissors, a bottle opener, and a small saw – ideal for cutting herbs, popping open canned beans, or producing kindling.
Aluminum foil has become my default choice for uncomplicated cooking and tidying up. It’s effortless to wrap potatoes or corn in foil and just throw them into the fire coals. These minor modifications help lessen the space taken in my backpack and lighten the load I shoulder on hiking trips to locate an optimal camping location.
Keeping this suggestion in mind has revolutionized my outdoor cooking practices by creating more space for other basics like water bottles or supplementary snacks.
Food Storage & Preservation Tips
After gathering all the right utensils and tools for cooking, I focus on how to store and preserve food. It’s crucial out in the wild. A good cooler keeps ingredients fresh. Ice packs play a big role here too.
For dry storage, sealed containers protect against pests and weather.
Handling food safely prevents spoilage. This means keeping raw meat away from veggies in the cooler. Learning this helped me avoid many camping mishaps over the years.
Always check that perishables stay cold enough, especially milk or chicken as food items prone to spoiling if not stored correctly.
Choosing the right coolers & ice packs
I always prioritize effectiveness and durability when selecting coolers and ice packs for my camping adventures. The cooler’s style significantly impacts its performance.
Hard-sided coolers maintain cooler temperatures over an extended period but are weightier, making them excellent for car camping.
Conversely, soft-sided coolers are less weighty and simpler to transport, ideal for brief hikes or casual outings. Ice packs come in a variety of configurations; I’ve discovered that reusable ones save money over time and also maintain their chill longer than ordinary ice.
Picking top-notch ice packs is as essential as determining the right cooler; their quality can significantly affect your outdoor food preservation setup.
I opt for ice packs filled with gel as they generally freeze at lower temperatures and maintain the chill considerably longer than their water-based counterparts.
This translates to my perishables, particularly cheese (camping essential for me), staying fresher longer during trips.
Successful camping cuisine begins with proficient ingredient storage.
Now, let’s shift our focus to dry food storage options. Check out the Best Camping Deals & Discounts here!
Dry food storage solutions
Preserving perishable food items presents its own unique hurdles. For items like meats, fruits, or vegetables, cooler packs serve as my go-to solution. These refrigeration aids keep these food types cool and prevent spoilage.
While it is a bit of an investment, the peace of mind knowing that my food is fresh and safe to consume is invaluable.
Hydration, understandably, is critical when camping. I always pack more water than I think I’ll need, both for consumption and for cooking purposes.
A high-capacity, insulated hydration bladder keeps my water cool throughout the day, and it’s easy to refill at clean water sources if needed.
I also like to add electrolyte tablets to my water to replenish lost minerals during physical activities.
All these considerations, while necessary, can seem overwhelming for novices. But with a bit of patience and the right equipment, efficient and effective food storage while camping can quickly become second nature.
Safe food handling to prevent spoilage
Handling food safely at the campsite keeps it fresh and prevents spoilage. I always store perishables in bear-resistant containers or coolers with ice packs to keep them cold.
This step is crucial for foods like eggs, ground beef, and chicken that can spoil quickly in warm conditions.
Dry goods like instant noodles, bread, and trail mix stay fine in airtight containers away from direct sunlight.
I also make sure to separate raw meat from ready-to-eat items to avoid cross-contamination. Washing hands before meal prep is non-negotiable for me, even if it means using biodegradable soap in a stream or lake.
Following these practices has helped me enjoy safe and delicious meals while exploring the great outdoors without worrying about foodborne illnesses ruining my adventure.
Easy Camping Meal Ideas & Recipes
After making sure food stays fresh and safe, it’s time to focus on the fun part: cooking! I always look forward to creating easy yet delicious meals while camping. Breakfast can kick off with overnight oats or pre-made pancake mix, saving me time in the morning for more activities.
For a hearty start, campfire breakfast burritos stuffed with eggs and bell peppers give me all the energy needed for a day of hiking.
For lunch, nothing beats the simplicity of wraps and sandwiches. They’re quick to make and packed with nutrients. Sometimes I prepare salads in mason jars ahead of my trip; they stay fresh and are perfect for no-cook midday meals.
Come dinner time, one-pot meals like chili or stew become my go-to since they’re filling and minimize cleanup. And what’s camping without some sweets? Classic s’mores or grilled fruit by the campfire wrap up my days perfectly.
The best moments are often found around a campfire, sharing stories and good food.
Quick & Nutritious Breakfast Ideas
I always inaugurate my camping mornings with swift and nourishing breakfast choices that energize my outdoor exploits. Overnight oats are a favored option for me. I combine them with milk or water and introduce some dried fruits or nuts before departing from home.
This results in a no-cook, straightforward preparation meal that’s ready by the break of day. Furthermore, I frequently ready pancake mix ahead of time. By integrating water into the already arranged mixture at camp, I relish hot pancakes cooked on a transportable stove.
Campfire breakfast burritos have emerged as another preferred selection of mine. Before departure, I scramble eggs and freeze them paired with diced veggies and shredded cheese in foil packets.
By morning, it’s as straightforward as warming these parcels above the campfire or stove. This technique saves time and remarkably minimizes cleanup tasks, allowing me to spend more time relishing the tranquility of the outdoors.
Overnight oats and pre-made pancake mix
Transitioning from generic breakfast suggestions to distinct ones, overnight oats and store-bought pancake mix are noticeable for their ease and adaptability. These choices notably save morning hours.
Combining oats with water or milk before sleeping equates to a meal ready upon waking. It’s uncomplicated to incorporate a few nuts, chocolate, or dried fruit for an added burst of flavor.
This method not only trims down the creation time but also lessens the requirement of morning fire or stove cooking.
Regarding pancakes, I combine ingredients such as flour, baking powder, and salt beforehand and preserve them in an airtight holder. Once at the camping spot, the sole requirement is the addition of water or milk along with an egg if accessible.
Preparing these on a travel-friendly stove is prompt and awards me extra moments to relish the morning in nature. Both the meals are strikingly satiating and equip the necessary vigor for day-long hiking or exploration.
Campfire breakfast burritos
Transitioning from sweet breakfast options like overnight oats to something savory, campfire breakfast burritos provide a fantastic start to the day. These are simple to prepare with a few basic ingredients: eggs, cheese, and your choice of meats or vegetables.
I initiate the process by cooking the eggs over an open campfire until they’re optimally prepared. Following that, I incorporate pre-cooked sausage or bacon and some diced peppers for extra flavor.
Encasing everything within a flour tortilla creates the perfect handheld meal.
I consistently ensure that these burritos are draped in aluminum foil before being placed on the grill or directly on the coals. This technique guarantees they warm up uniformly, causing the cheese to melt delightfully and combining all flavors within that velvety tortilla shell.
From my previous experiences, I’ve recognized that the use of heavy-duty aluminum foil significantly prevents tears and spills during cooking over an open fire.
I must express, that there’s nothing comparable to relishing one of these substantial burritos while witnessing the sunrise at your campsite – it’s truly the epitome of camping food.
Simple Lunch & No-Cook Meals
For simple lunches that need no cooking, I always pack wraps and sandwiches. They’re quick to make and carry well on hikes or picnics. I add spinach, carrots, and a bit of black pepper for taste.
It’s great because these ingredients don’t spoil quickly. Another favorite is energy-packed snacks like trail mix and granola bars. These keep me going during long walks without weighing down the backpack.
Make-ahead salads in mason jars are another go-to for me. I layer the dressing at the bottom, followed by heavier items like beans or chicken, and then top with lighter greens to keep everything fresh until it’s time to eat.
This method has never failed me on camping trips.
Moving on from lunch ideas, let’s talk about dinner options next.
Wraps, sandwiches, and energy-packed snacks
I pack wraps, sandwiches, and snacks filled with energy for my hikes. These meals are simple to make and carry. Wraps are perfect because they don’t get soggy as quickly as bread does.
I fill them with a mix of proteins like chicken or beans and add lots of veggies. For sandwiches, I prefer using hearty bread that can withstand a bit of pressure in the backpack. Adding eggs or slices of meat provides the protein needed for long walks.
Snacks play a big role too. I always bring along nuts, seeds, and dried fruits mixed together in a baggie. This homemade trail mix gives me a quick energy boost without taking up much space.
Portable and high in nutrients, these food options keep me fueled up on any outdoor adventure without weighing me down.
Make-ahead salads in mason jars
Preparing salads in mason jars for my camping adventures has shown significant advantages. The layering of ingredients maintains their freshness and averts fogginess.
I initiate with dressing at the bottom, followed by hardy veggies like carrots or cucumbers, then add softer items like tomatoes or avocados.
Proteins and greens are added at last, ensuring their crispiness. This method is effective in keeping ingredients separate until ready to consume and also eases up the packing process.
Mason jars get conveniently placed into coolers or bear-resistant food storage containers.
These salads in jars are great time-savers at the campsite. There’s no requirement for chopping vegetables or preparing dressings in the open air. Instead, I simply give the jar a good shake to mix everything just before consumption.
This approach reduces meal prep time and also lessens the use of extra bowls or utensils, ensuring an organized picnic table and easy cleanup.
What’s more, the utilization of reusable mason jars is in line with eco-friendly practices by reducing waste a victory for both me and nature!
Hearty & Delicious Camping Dinners
After savoring pre-prepared salads in mason jars, I sometimes yearn for something heartier for dinner. Staples like chili, pasta, and stews become my preferred choices. These meals effectively satisfy hunger and provide comfort after a lengthy day of backpacking or hiking.
I realized that utilizing a Dutch oven or aluminum foil for these recipes considerably simplifies both cooking and tidying up.
I’ve found that meals in foil packets are a wonderful strategy to indulge in substantial dinners with minimal effort.
By enclosing ingredients such as chicken, vegetables, and potatoes in aluminum foil, and then placing them into heated coals or on a grill above the campfire, I achieve a tastefully cooked meal without soiling pots or pans.
This method not only conserves time, but also provides me an opportunity to try out various tastes and ingredients while appreciating the natural environment.
One-pot meals: Chili, pasta, and stews
Transitioning from broad dinner concepts to more distinct ideas, one-pot dishes such as chili, pasta, and stews are notable for their easiness and taste.
These meals prove ideal for camping due to their quality which allows me to mix all the ingredients into a single cooking item.
This implies there’s less cleaning afterward, a perk that always enhances outdoor enjoyment. I frequently select durable cast iron or featherweight non-stick pots that spread the heat evenly over a bonfire or mobile cooker.
I enjoy discovering a variety of recipes that incorporate freeze-drying certain ingredients in advance to save cooler room. A preference of mine includes incorporating desiccated vegetables into pasta or creating a substantial chili using pre-seasoned meat packets I arranged at home.
This method does more than simplifying my meal preparation routine, it also guarantees that I’m not giving up flavor for simplicity. Furthermore, these nutrient-filled foods offer the necessary energy after a long day of trekking or backpacking in the wilderness.
Foil packet meals for easy cleanup
I always anticipate preparing foil packet meals at the campsite. These require encasing ingredients in aluminum foil and allowing them to cook over a campfire or on a grill. These packets not merely seal in flavors, but also simplify post-meal washing up.
Visualize relishing your fajitas or vegetables steamed to perfection without the concern of cleaning pots afterward. Simply take the time to prep the packets before your departure by mixing seasonings, meats, and veggies.
Once they’re cooked, consume directly out of the packet to cut down on dishes.
Following this: an examination of how cast iron cookware enriches camping food beyond conventional meals.
Campfire Desserts & Snacks
Creating desserts and snacks over a campfire is an activity I greatly enjoy while camping. Traditional s’mores always please, with their warm marshmallows, melted chocolate, and crunchy graham crackers.
I love to get creative by incorporating various ingredients like peanut butter or substituting graham crackers with cookies for a unique spin on the classic recipe. Another delight I take pleasure in is roasting fruit directly on the open flame.
The caramelization of peaches and pineapples makes them exceptionally sweet, a fitting choice for a healthier dessert option.
Campfire pies also provide an engaging variation to outdoor cooking. Using a pie iron, you have the ability to stuff bread with any sweet filling you prefer, from cherry pie filling to Nutella and banana slices.
Heating it over the coals crisps the bread and heats the filling, yielding an enticing treat that’s convenient to savor around a fire. These delicious treats cater to your sweet cravings while also serving as a common interest for everyone after a day filled with fun.
The following points concern mastering campfire cooking techniques.
Classic s’mores and variations
Moving from campfire desserts to a timeless classic, I always get excited about making s’mores. These treats involve roasting marshmallows over the campfire until they’re perfectly golden.
Then, I sandwich them between two pieces of graham crackers with a piece of chocolate. It’s simple yet so satisfying. Lately, I’ve experimented with variations to spice things up. For example, replacing the traditional chocolate bar with different flavors like peanut butter cups or mint chocolate adds an unexpected twist.
I also tried using cookies instead of graham crackers for an extra dose of sweetness. Aluminum foil becomes my best friend when I want to make a bunch at once without the mess.
This trick lets everyone enjoy their customized versions without waiting too long.
Sharing these moments and treats under the stars brings us closer together, making each camping trip memorable.
Grilled fruit and campfire pies
After mastering the art of classic s’mores, I decided to explore other campfire desserts like grilled fruit and campfire pies. Grilling fruit is a simple yet delicious way to enjoy something sweet.
I often slice peaches or pineapples and place them directly on the grill for a few minutes. This method caramelizes the sugars in the fruit, bringing out an incredible flavor that’s perfect with a dollop of whipped cream or ice cream.
For campfire pies, my go-to involves using a cast iron pie iron. I fill two slices of bread with my favorite pie fillings usually apple slices tossed with cinnamon and sugar—and then cook it over the embers until golden brown.
It’s basically like making a hot pocket stuffed with pie filling right there by the fire. These treats have become a hit every time I’ve shared them with friends while camping. They’re easy to make and bring a sweet twist to any outdoor adventure.
Cooking Methods for Camping
After savoring grilled fruit and campfire pies, I find exploring different cooking methods for camping equally thrilling. Campfire cooking offers a classic experience. I prefer using an open flame for that authentic taste but sometimes switch to coals for even heat distribution.
Building a fire requires gathering dry wood and maintaining it safely – a skill every camper should master.
Switching gears, I also use a camping stove because it’s quick and efficient. It’s essential to pick the right fuel type to match my stove. Whether using butane or propane, I always aim for fuel efficiency by adjusting the flame based on what I’m cooking.
This versatility allows me to prepare various meals without the extended wait times of traditional campfires.
Campfire Cooking Techniques
Shifting our attention from generalized camping cooking methods, we can specialize in campfire cooking techniques. I consistently observe that utilizing an open flame or coal introduces a distinct taste to food, unattainable from a typical kitchen stove.
The secret to becoming proficient in this lies in the understanding of how to construct and sustain a cooking fire. In my case, it initiates with collecting dry wood and systematically organizing it to ensure the fire ignites swiftly and burns steadily.
I favor using coals for cooking as they supply consistent heat, which is critically essential for meals like foil packet meals or grilled vegetables.
I also ensure to include aluminum foil and cast iron cookware in my gear while preparing to cook over a campfire. These materials are durable as well as outstanding at spreading heat uniformly.
Cooking directly over an open flame can be slightly challenging since managing the temperature requires experience, but it’s excellent for roasting hot dogs or marshmallows on sticks – traditional camping treats!
Shuffling between various heat sources, like shifting pans away from direct flames to warmer coals, assists me in preventing food from getting burnt while still reaching that delectable smoky flavor everyone adores during camping trips.
coal cooking
Cooking over an open flame brings a unique flavor to food that many camping enthusiasts love. I find this method perfect for grilling vegetables, toasting marshmallows for s’mores, and searing meat.
The direct exposure to the flames and smoke adds a smoky taste that can’t be replicated in any kitchen oven.
Using coal, on the other hand, gives me more control over cooking temperature. It’s ideal for slow-cooking dishes like chili or stew in a Dutch oven. The coals provide a consistent heat source that surrounds the pot evenly, letting everything inside cook perfectly without burning one side or leaving it raw on the other.
This technique requires some patience and practice but rewards with rich flavors in every bite.
How to build and maintain a cooking fire
After exploring the differences between open flame and coal cooking, I find building a proper cooking fire crucial. First, I choose a safe spot away from tents and trees. Then, I gather dry wood and materials to start my fire.
To kick things off, I arrange small twigs in a teepee shape around my tinder before lighting it. As the flames grow, I add larger pieces of wood to keep it steady.
Maintaining the fire requires attention. I make sure to regularly add wood to prevent it from going out. If I’m aiming for coals suitable for foods like pizza or muffins that need even heating, letting some logs burn down is key.
Throughout this process, having water nearby ensures safety if the flames become too lively or when it’s time to extinguish the fire at night’s end.
Using a Camping Stove Efficiently
I always get excited about using my portable camping stove. To make every fuel canister last, I’ve learned a few tricks. First, I find the right balance of heat needed to cook different meals.
It saves gas and prevents burning food. I also use a windscreen to protect the flame and increase efficiency.
Next up is mastering Dutch Oven cooking for those hearty camp dinners we all love.
Fuel efficiency tips
On my many camping trips, I’ve learned how to use a camping stove with care. Keeping the flame adjusted to the right level saves fuel. You don’t want it too high when simmering soup or making hot chocolate.
A gentle flame does the trick and conserves fuel.
Choosing the right kind of fuel can also make a difference. For instance, propane is great for quick cooking, but white gas might be better for colder weather. This choice affects how long your fuel lasts and how efficiently you cook while enjoying nature’s beauty.
Adjusting heat for different meals
After mastering fuel efficiency, I found adjusting the heat for various meals essential during my camping adventures. Cooking on a portable stove or campfire requires different approaches to manage temperature effectively.
For boiling water for ramen or making coffee in a kettle, high heat gets the job done fast. But for meals like eggs as food or simmering stews, I learned to lower the flame or move pots further from direct flames on a campfire.
I also discovered that aluminum foil is fantastic for controlling cooking temperatures. Wrapping potatoes or corn in foil and placing them at the edge of a campfire lets them cook thoroughly without burning.
This simple adjustment made all the difference in preparing delicious and well-cooked meals while enjoying the great outdoors.
Dutch Oven Cooking for Beginners
Adjusting the temperature for a variety of dishes brings me to a marvelous cooking method that I’ve recently grown fond of: Dutch oven cooking. This method has elevated my camping dishes from basic to memorable.
A Dutch oven is a sturdy pot that is capable of handling tasks ranging from baking bread to simmering stews over an open flame or on a pile of coals.
I found out the importance of seasoning and taking care of this multi-purpose cookware through my own experiences. Before using mine for the first time, I seasoned it by giving it a thin layer of cooking oil and heating it gently to allow the oil to permeate the cast iron.
This procedure produces a non-stick surface and aids in preventing rust, guaranteeing tasty dishes every time. On my journey, I found that easy recipes like one-dish pasta and campfire chili are not just delicious but also provide deep satisfaction after a tiring day of hiking or backpacking.
Just with some pre-set ingredients and a little stirring, I was able to enjoy wholesome meals without a lot of trouble.
How to season and maintain a Dutch oven
After getting the hang of Dutch oven cooking, it’s crucial to learn how to season and maintain it. Seasoning a Dutch oven properly creates a non-stick surface and prevents rust. I start by washing it with warm, soapy water.
Then, I dry it thoroughly since any moisture can lead to rust. Next, I coat the entire oven inside and out with a light layer of vegetable oil or shortening. Some folks use flaxseed oil for its durability at high temperatures.
To bake the seasoning in, I place the Dutch oven upside down in a preheated oven at 350 degrees Fahrenheit for about an hour. This process helps create a hard, protective layer over the cast iron.
It’s something you’ll need to do occasionally to maintain that prized non-stick surface and protect against corrosion. After each camping trip where my Dutch oven sees action—cooking chili under open skies or baking bread over campfire coals—I make sure to clean it gently without soap (to preserve the seasoning), dry it completely, and apply another thin layer of oil before storing away.
Keeping these steps in mind ensures my Dutch oven is always ready for another outdoor adventure.
Easy Dutch oven recipes for camping
I love cooking with my Dutch oven while camping. It makes meals simple and delicious. One favorite recipe is a Dutch oven chili. I start by browning some ground beef or turkey over the campfire, then adding diced tomatoes, beans, onions, and spices right into the pot.
The blend simmers for an hour, melding flavors beautifully in the great outdoors.
Another go-to is Dutch oven cornbread. Mixing cornmeal, flour, milk, eggs, and a bit of syrup creates a batter that cooks to perfection nestled among coals. This pairs wonderfully with chili or stew.
Both recipes require minimal utensils and make use of readily available ingredients like aluminum foil for easy cleanup. They turn meal times into highlights of any camping trip without needing extensive kitchen gadgets or bakeware.
Food Safety & Cleanup Tips
Managing food properly at the campsite ensures everyone’s health and happiness. I always separate raw meats from vegetables and fruits to prevent cross-contamination.
I use different coolers for beverages and perishable items to maintain the correct temperatures for each, making them last longer.
For environmentally friendly dishwashing, I choose biodegradable soap that doesn’t harm the surrounding environment. Proper disposal of food waste is vital too; I either pack it out or utilize designated disposal sites.
Hygiene is significantly important in this process. I carry aluminum foil and parchment paper for cooking, making cleaning effortless and no need for pot-scrubbing at night! After meals, using cartons or reusable containers makes leftover management easy, preventing animals from being attracted.
This method saves time and further reduces my footprint on the environment, adhering to the backpacking principles of leaving no trace.
Safe Food Handling at the Campsite
I always make sure to avoid cross-contamination while cooking at the campsite. This means keeping raw meat away from fruits and veggies. I use separate cutting boards and utensils for each.
It’s essential to prevent any sort of foodborne illness that can turn a great camping trip sour fast.
Storing perishables properly is another priority of mine. Coolers are my go-to, packed with plenty of ice packs to keep everything cold. Dry foods stay in airtight containers to fend off critters and moisture.
Proper food handling ensures our camping meals are safe and delicious, letting us enjoy the great outdoors without worry.
Avoiding cross-contamination
After we cover safe food handling, let’s tackle avoiding cross-contamination. Keeping raw and ready-to-eat foods separate is crucial while camping. Use different utensils and cutting boards for meats and veggies.
This way, we keep harmful bacteria away from our meals.
Washing hands before cooking or eating also plays a big part in this process. I make sure to use biodegradable soap because it’s good for the environment. Drying my hands with a clean towel afterward stops germs from spreading.
These steps ensure everyone enjoys their camping meals safely.
Storing perishables properly
I always make sure to pack my perishables in a high-quality cooler with plenty of ice packs. This method keeps food safe from spoilage, especially during long camping trips where access to fresh supplies can be limited.
I’ve learned that pre-chilling the cooler before packing it helps maintain low temperatures longer, ensuring that items like meat and dairy stay fresh.
Choosing the right coolers is crucial for any outdoor enthusiast. I prefer using ones designed specifically for extended periods, often opting for models with thick insulation and tight-sealing lids.
For hikes away from camp, I carry lightweight, insulated bags to keep snacks and drinks cold. It’s all about balancing convenience with effectiveness, making sure everything from fresh fruits to beverages remains at a safe temperature until ready to use.
Eco-Friendly Dishwashing & Waste Management
Using biodegradable soaps and natural sponges has changed my camping clean-up game. These eco-friendly choices break down naturally in the environment, preventing harm to local wildlife and ecosystems.
I make sure to wash dishes at least 200 feet away from any water sources. This practice helps keep streams and lakes free of pollutants.
For waste management, I’ve learned how important it is to carry all trash out with me. Even though it might seem like some food waste could biodegrade, leaving anything behind can disrupt local animals’ feeding habits.
I pack extra reusable bags specifically for collecting waste throughout the trip. Also, separating recyclables from non-recyclables becomes easier this way, ensuring nothing gets left behind or improperly disposed of in nature.
Best biodegradable soaps and sponges
I always pack biodegradable soaps and sponges for cleaning up after meals. These products break down naturally in the environment, reducing my footprint on nature trails and campsites.
The best part? They’re as effective as their non-biodegradable counterparts but much kinder to the water sources around camping areas. I find products made from natural materials like coconut fiber or cellulose are tough on dirt yet gentle on hands and gear.
Choosing eco-friendly dishwashing items also means I’m contributing to less pollution in our waterways. After switching to biodegradable options, I noticed no difference in cleaning power but felt better about my impact on the ecosystem.
Next, let’s talk about how to dispose of food waste responsibly while keeping campsites clean and wildlife safe.
How to dispose of food waste responsibly
After discussing the best biodegradable soaps and sponges, it’s crucial to talk about proper food waste disposal. Ensuring I leave no trace behind starts with how I manage my leftovers.
I always pack any uneaten food out with me, using lightweight, sealable bags designed for outdoor activities. This method keeps smells contained and reduces the chance of attracting wildlife to my campsite or along the trail.
For compostable waste like fruit peels or eggshells, I use a designated compost bag. During my hikes, I’ve seen too many times how leaving such items in nature impacts local wildlife and ecosystems negatively even though they’re biodegradable.
At home, these scraps go into my compost bin, but while camping in the backcountry, carrying them out until I find an appropriate disposal option is vital. This practice makes sure that the natural beauty remains undisturbed for fellow outdoor enthusiasts to enjoy.
Pro Tips for Effortless Camping Cooking
I initiate my camping trip preparation by marinating meats and chopping vegetables in advance. This technique has freed up substantial cooking time at the campsite.
I store these ready ingredients in individual bags to maintain flavor freshness and ward off any cross-contamination.
Aluminum foil becomes my foremost ally for preparing nearly everything, from securely packaged breakfast eggs to dinnertime pouches of chicken and vegetables thrown over the campfire.
My observation that parchment paper used within the foil packages obstructs sticking and also simplifies clearing up was significant.
An indispensable kitchen gadget for me during outdoor excursions is a versatile tool functioning as a knife, spoon, fork, and bottle opener, all in one.
It reduces what I need to lug around and greatly streamlines meals.
For edibles that don’t necessitate refrigeration, such as freeze-dried meals or energy bars, I depend considerably on these for prompt lunches or nibbles during hikes.
They are light to tote around and need minimal preparation – ideal when you’re on trail explorations.
The selection of transportable cookware has revolutionized my camping experience; lightweight non-stick pans are easy to cleanse and assist in equal heat distribution when preparing meals over capricious campfires or stoves.
Subsequent stage: A checklist for the types of food to carry could be your key to transforming into an expert camping chef!
Meal Prepping Before Your Trip
Before starting on hiking trails, I always spend a little while preparing meals. This includes chopping up vegetables in advance and flavoring meats to save time down the line.
Aluminum foil becomes invaluable, securely encasing these ingredients to ensure freshness and taste.
Completing this process streamlines the cooking and also makes sure I carry exactly what I need, preventing excess burden.
Arranging meals in portions brings ease to my open-air escapades. I use light containers that tuck comfortably into my backpack. This strategy promotes orderliness and guarantees each meal is primed when hunger calls after a long hiking day or assembling the camp.
In this way, meal preparation helps me concentrate on the pleasure of nature instead of the stress over the upcoming meals.
Pre-cutting ingredients & marinating meats
I always pre-cut my vegetables and marinate meats before hitting the campgrounds. This step saves me a ton of time and makes cooking easier. With everything sliced, diced, and seasoned in advance, I can focus on enjoying the outdoor experience rather than spending hours preparing food at the site.
Pre-marinating meats ensure they’re flavorful and tender, ready to cook over an open flame or on a portable stove.
Packing these prepped ingredients in aluminum foil helps with quick cleanup too. I create meal packets that go directly from cooler to fire or stove, leaving more time for hiking or relaxing by the campfire.
The next part of effortless camping cooking involves packing portioned meals for convenience.
Packing portioned meals for convenience
After prepping and seasoning the necessary ingredients for meals, the following move is the packaging of portioned meals. This approach sets a new standard for any nature lover.
It reduces meal preparation time and guarantees that I have additional time to relish the splendor of the outdoors.
For breakfast, I set aside single servings of overnight oats in containers. Lunch could be ready-made wraps or sandwiches, which are easy to pick from the cooler.
Dinner often consists of foil packet meals with vegetables and meat, excellent for throwing over campfires or on a transportable stove. Each meal is precisely calculated to prevent surplus and guarantee ample nutrition.
Implementing aluminum foil not only simplifies the cooking of these meals but also serves speedy cleanup, representing environmental consciousness by decreasing dishwashing necessities at camping locations.
These actions majorly enrich my camping experience, enabling me to concentrate further on hiking rather than stressing over food preparation.
Time-Saving Cooking Hacks for Camping
I regularly use aluminum foil and parchment paper for easy camping meals. Wrapping food items in foil allows me to directly place them on coals or a grill, avoiding the necessity for pots or pans.
The previous summer, I prepared delightful corn in foil. It was cooked perfectly alongside my principal meal without any cleanup required.
Moreover, ingredients with multiple uses save both space and time. I carry olive oil as opposed to numerous cooking fats, as it is suitable for both frying and making salads.
During my previous adventure, the olive oil proved invaluable, aiding in preparing pancakes in the morning and grilling chicken later in the evening.
This strategy reduces what I have to carry and eases the process of meal preparation.
Using foil and parchment paper for easy cooking
I have discovered that using aluminum foil and parchment paper makes cooking while camping incredibly easy. Foil is perfect for making packet meals. Just wrap ingredients in foil, then toss them on a grill or into campfire coals.
This method seals in flavors and moisture, creating delicious meals with minimal effort. Plus, cleanup is a breeze since there’s no cookware to wash.
Similarly, parchment paper comes in handy when baking over a camp stove or fire. It prevents food from sticking to pans and pots, saving me time and hassle during cleanup.
I’ve baked everything from cookies to savory bread without worrying about a difficult clean-up afterward.
These simple materials have revolutionized the way I cook outdoors, proving you don’t need fancy equipment for great results.
Multi-use ingredients to minimize packing
Having multi-purpose ingredients truly helps minimize space and weight, a strategy I’ve grasped over numerous camping journeys. Take olive oil, for instance, it’s excellent for both cooking and dressing salads.
It’s light and can be carried in aluminum foil packs or petite bottles, making it ideal for backpacking. Powdered milk is another handy item; when mixed with water, it can be used to prepare milk for morning coffee or can be used to thicken dinner sauces.
Having spices combined in one receptacle also helps in reducing mess. Before the trip, I blend salt, pepper, garlic powder, and dried herbs, using this mixture to season everything from morning eggs to nighttime stews.
This method makes packing simpler and guarantees that meals maintain variety even when you’re deep in the wilds. These tactics help me to reduce my burden and enhance the taste of simple campfire meals without the necessity to bring my entire kitchen larder.
Conclusion & Final Checklist
I’ve shared everything you need to master camping cooking and food prep. From picking the right gear to whipping up delicious meals, I hope you feel ready. Don’t forget to keep your campsite clean and respect nature.
I promise, that with these tips, your next outdoor adventure will be a breeze. Start packing and let the fun begin!
Recap of key tips for cooking while camping
Planning meals ahead saves a lot of hassle. From personal experience, jotting down a menu before hitting the road means less time worrying about what to cook and more time enjoying nature.
I always pre-cut ingredients and marinate meats at home. This trick cuts down cooking time by half at the campsite.
Packing the right gear is crucial too. Can’t stress enough how important a portable camping stove has been in my backpacking adventures. It’s lightweight and easy to use, making it perfect for quick meals on the go.
Alongside this, aluminum foil becomes a multifunctional tool for cooking everything from fish to veggies over an open fire or on a stove with minimal cleanup needed afterward.
Printable camping food checklist
I made a printable camping food checklist to help fellow outdoor enthusiasts. This list covers everything needed for meal prep, from breakfast to dinner and snacks in between.
It includes items for grilling, using aluminum foil for easy cooking, and options that require minimal kitchen utensils.
The checklist focuses on both perishable and freeze-dried foods to accommodate different storage possibilities.
The checklist also suggests multi-use ingredients to save space and reduce waste, perfect for backpacking trips where every ounce counts.
I’ve included reminders about bringing biodegradable soap for cleanup and aluminum containers or pans that serve dual purposes – cooking and eating from the same dish reduces dishes to wash!
This comprehensive list aims to streamline your packing process, ensuring you bring exactly what you need without overpacking.
FAQs
1. What are some good food prep tips for backpacking?
When you’re hiking and backpacking, it’s crucial to plan your meals carefully. Consider freeze-drying meals before your trip; they’re lightweight and easy to carry. Don’t forget your cookware and bakeware either – compact, portable options are best.
2. How can I cook efficiently while camping?
Efficiency is key when you’re cooking in the great outdoors! Make sure you have suitable cookware and bakeware that’s designed for camping use. Foil can be a handy tool too – wrap up veggies or meat for an easy foil packet meal cooked over the campfire.
3. Are there eco-friendly options for camping cooking utensils?
Absolutely! You’ll find many biodegradable options available these days, from plates and cups to cutlery. Choosing biodegradable products helps reduce waste on our trails and campsites.
4. How does freeze drying work for camp food preparation?
Freeze drying involves removing water from food by freezing it then slowly heating it in a vacuum condition to remove ice crystals formed by frozen water inside the food structure leaving behind a dry product that could be stored at room temperature without spoiling.